Configuring Policies for Social Networking Sites
You can allow users to access social networking sites (Example: Facebook) through corporate email for business development purposes while enforcing controls on users who access such sites through personal accounts.
This feature provides visibility to users involved in activities such as posting messages, comments, file uploads and downloads, and sharing and liking posts on social networking sites such as Facebook.
Follow these steps to configure controls for the social networking sites:
- From the Management Console, select Protect > Access Control.
- Click New under Web & Application Policy.
- Enter a Policy Name (required) and a Description (optional). The policy name must include only alphanumeric characters, with no special characters other than the underscore, and no spaces.
- Select DLP Scan as the Content Inspection Type.
- (Optional) To specify a time range in which the cloud application will be available, click the Time Window toggle. Then, select these options:
- The days of the week for which you want to apply a time window - To add a time range for after office hours, (for example, from 7:00 PM to 8:00 AM), you need to configure two time-window settings: the first for the hours up until midnight; the second for the hours starting at midnight and ending at the desired morning time.
- The time range for those days - To add another time window, click the + icon at the right, then select the days and time ranges for that time window.
- To set after-office hours time window options: Set a time range from 7:00 PM until 0:00 (midnight).
- Click the + sign to add a time range from 0:00 (midnight) until 8:00 am.
- Click Next. For Context and Actions, select the options for the policy type you choose in the previous step.
- Select cloud applications and website categories from the Clouds list. Use the up or down arrows to expand/collapse the category lists to view and select the applications or sites for the policy
- Select these categories from the Destinations list:Social (Unsanctioned Clouds > Category)Social Networking (Websites > System Category)
- Under Activities, select one of these activities: Under Activities, select one of these activities: All Activities. Upload - Uploading files to social networking sites. Download - Downloading files from social networking sites. Update - Posting messages, Comments, Sharing and Liking posts on social networking sites. Under Content Scanning, select the Data Type depending on the activity that you selected. Structured Data - For Update related activities on social networking sites. Files - For File upload and download activities on social networking sites
- (For DLP scan content inspection) Select a Rule Template.
- Under Context Rules, select a context type and its details. To apply more than one context type, click the + button at the right, select an additional context type and details. See the table below for more details.
- Click Next to select actions.
- Session Action – Allow & Log or Deny.
- Select a secondary action. Example: o365tenantname.mail.protection.outlook.com o365tenantname - customer's O365 tenant name.
- For email, the Quarantine Copy secondary action makes a copy of any email containing violating content in the subject line, body, or attachments. You can choose the Allow & Log primary action to allow access, while a copy of the message is placed in quarantine for review of the violating content.The Quarantine Copy action is applied only once per email, even if there are multiple violations in different parts of the content.
- If you have set up Continuous Authentication or User Coaching, those options are also available. Select notifications from the list. The listed items are based on notifications you created previously.
- If you select Remove Recipients as a secondary action with external domains, use the Select Domain Categories prompt to choose one or more domain categories. These are custom categories that you created as described in the Creating and managing custom categories section.The policy will act on all external domains if you do not enter any domain values. The value of All is not supported. To include additional secondary actions, click the + icon to the right of the prompt
- Click Save.
- Review the summary information for the policy. Click Confirm to save the policy or Previous to make any corrections.
| Context Type | Options |
|---|---|
| Users | Choose All or Selected. For Selected, enter a valid email address for each user. Separate each address with a comma. |
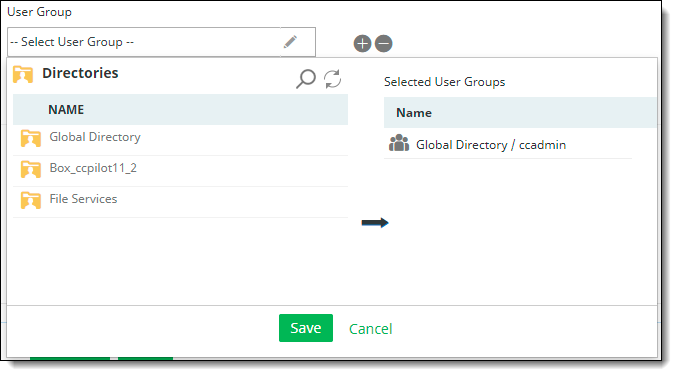
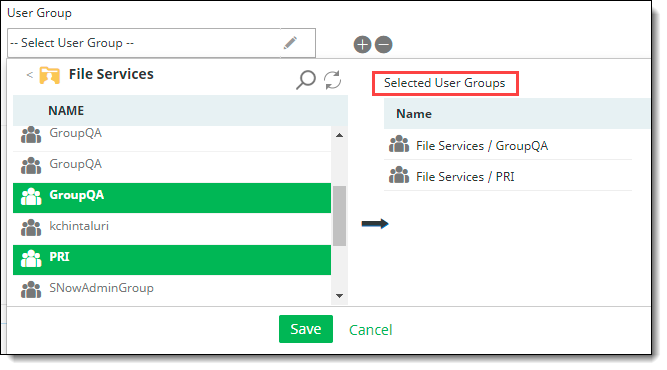
| User Group | User groups are organized into directories for clearer organization. When you select User Group as a context type, the available directories containing the groups are listed in the left column. Select a directory to view the user groups it contains. The user groups for that directory are displayed in the right column. Select the groups from the list and click the right-arrow icon to move them to the Selected User Groups column and click Save. These are the groups to which the policy will apply. To search for a directory or group, click the Search icon at the top of the left column. To refresh the list, click the Refresh icon at the top of the left column. |
| Location | Check one or more locations, or check Select All. |
| Device Profile | Select a context type and a target for each type. Managed status: Select an option.
Compliance Status: Select one or more options.
Depending on what you select, some other options are disabled. For example, if you select Protected, Disconnected is disabled. If you select Disconnected, Protected is disabled. Threat Status: Select one or more options.
Click the + sign at the right to add additional Device Profile contexts. After you have selected and configured all of the context options for Device Profile (Managed Status, Compliance Status, and Threat Status), you cannot select additional targets if you add another Device Profile context rule. |
| Device OS | From the Match prompt, select an operator: Equal To, Not Equal To, Greater Than, or Less Than. Then, from the Device OS prompt, select an OS and an OS version. If you selected Equal To or Not Equal To, you can select multiple OS versions or click Select All. If you selected Greater Than or Less Than, you can only choose one OS version from each category. After selecting the desired OS versions, click Save. Device OS context policies are currently supported only on OS versions under 11 for both Windows and MacOS. |
| Browser Types | From the Match prompt, select an operator: Equal To, Not Equal To, Greater Than, or Less Than. Then, from the Browser Types prompt, select a browser type and version. For Equal To or Not Equal To, you can select multiple browser versions or click Select All. For Greater Than or Less Than, you can choose only one browser version from each category. Click Save. |
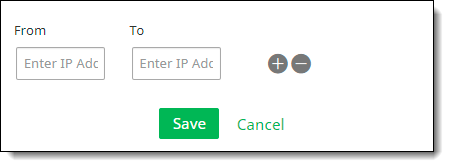
| Source IP | Select a valid IP address range. (Optional) To enter an additional range, click the + icon and enter the range. Click Save. |
| IP Risk Score | Select a risk score level: Low & Above, Medium & Above, or High. |
| Sharing Type | Select External or Internal. |